I say that I am creative. At least when it comes to home improvement. When it comes to decorative decorating, I prefer to hold back.
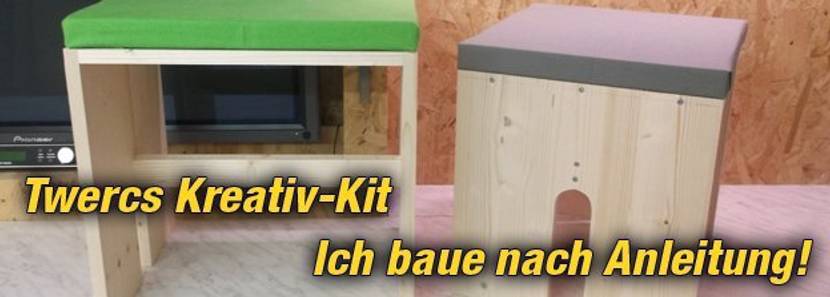
As part of my test of the Vorwerk dwarves (called Twercs), I was also able to test the Vorwerk Twercs creative kit after the Vorwerk Twercs suitcase. This is specifically the Vorwerk Twerc Creative kit stool set space saver. I have to mention right from the start that the term “space miracle” is evident neither from the range of items on offer nor from the description.
But since I’m creative, I naturally found two DIY options to make myself have the stools combined and therefore only take up as much space as the larger stool alone. So, dear Twercs team, you are welcome to add a picture to your instructions on heimwerker.de or to add a picture to the offer. But now to the construction.
1. The packaging is not a space saver

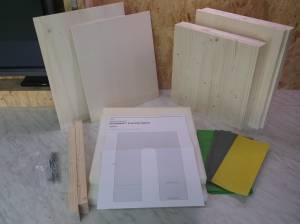
The contents of the package.
In the test report on the Vorwerk Twercs suitcase, I complained that some things were packed with more material than necessary. Unfortunately, this also continues with the creative kit. The content is again very tidy Attention to detailhowever, the Styrofoam pads could be removed or at least significantly reduced to fill up the space.
They only serve to fill the cavity in the box and without them it could be significantly smaller. But let’s unpack first, dispose of the packaging and focus on the individual parts. Vorwerk Twercs are included as accessories In addition to colorful building instructions, all the materials required, such as wood, foam, fabric, sandpaper and screws. Everything is complete and absolutely no additional accessories are required.
The required tools are the Vorwerk Twercs tools, which are inspired by Bosch tools are sufficient. And even if I am willing to use the one I have, I strictly adhere to the Vorwerk Twercs construction instructions and the tools mentioned there. I’m brave about that.
2. Drilling and sawing work on the first stool
So I take the construction instructions from Vorwerk Twercs and use a board to mark the thickness of the board on the side parts and then mark the drill holes for the screws at half the thickness. Take a steel measure and mark half the thickness of the board (18 / 2 = 9).
Yes, I admit, I do I didn’t follow the instructions for the first time and on top of that, tools are used that are not included in the Vorwerk Twercs creative kit. I’m sorry. To be fair, I have to say that the version in the instructions also works.
Next, the cutout and screw holes of the crossbar are marked according to the template. This should be possible for anyone to realize. But… I need scissors to cut out the template. 🙂 So it doesn’t work without other tools. But scissors should be found in every workshop or household. However, if there are children in the house, an extensive search is required first. The best thing to do is to involve your children in building with Vorwerk Twercs. However, Vorwerk Twercs is not recommended for children of kindergarten age.
Once the boards have been cut out with the Twercs jigsaw, they can be deburred and sanded a little. Since I didn’t want to use any other tools, I used one of the sawn-out pieces as a sanding block. It works quite well, I just would have liked additional, finer sandpaper.

Mark according to template | Saw out a section | deburring edges
3. A few screws and the stool takes shape
Now the time has come and I really can’t get by without my own resourcess. Anyone who knows glued wood also knows the sometimes curved shape. Sure, it’s not intentional on the part of the manufacturer, it’s design. 🙂 Vorwerk can’t help it, that’s just the way it is with glued wood.
Now, according to the instructions, I should fix the two boards with the Twercs hot glue gun and then screw them together. This will be difficult with the curved shape and I prefer to use a screw clamp. In this case, unfortunately, there is no other way to do it if things are to be done properly later. But I overcome that too and can then shorten the wooden strip to suit and insert it. The stool is almost finished.

Screw boards together | Shorten the wooden strip to suit | The stool is standing
- View screw clamps on Amazon.de »
4. The padding for delicate buttocks

The seat is postered.
I, a slim little deer, naturally want to sit softly and therefore need a seat cushion. It’s good that Vorwerk thought of this and included one in their Vorwerk Twercs kit. In terms of quality, I really like it, because dThe foam is quite stable and doesn’t sit through despite its small thickness.
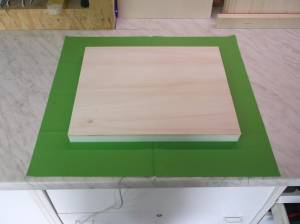
The Building the seat is quite simple and doesn’t pose a big problem. First, the foam is fixed to the plywood with the hot glue gun and placed on the included fabric. Align something and then attach the fabric with the Twercs cordless staple gun. You should always start on the straight sides so that the fabric can be aligned evenly.
At the corners Of course, wrinkles cannot be avoided. Everyone can decide for themselves how they are designed. Therefore I would like to present only two variants in pictures. Yes, I’ve done this a few times and have some practice with it. 😉
A notice: With the first variant (green) you could possibly divide the folded piece (second picture) evenly on both sides. This would create a nicer picture, but then there would only be a layer of fabric on the sharp wooden corner, which would quickly lead to the fabric tearing.

Two methods for padding.
5. Stools become a space saver
We have now reached the point that Vorwerk is keeping secret from us. Why are the stools a space saver?
You can combine them and suddenly it makes sense why the cushions are not attached to the seat. This has to be removed from the small stool, to accommodate him under the big one. In my pictures you can see two variants of how the stools can be placed to save space. There may even be others.

Variant 1 | Variant 2
6. My impression of the creative kit stool set space miracle

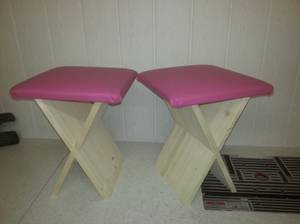
My self-made stools.
There shouldn’t really be a conclusion because I just wanted to describe the construction. But I know full well that some people are expecting an answer to a very specific question. Why does the creative kit cost so much and is it worth it? I can’t answer it clearly and you probably have to distinguish between the expected group of buyers here.
If I want to build stools as a do-it-yourselfer, I do it because I care about the skills and technology, I want to create something and certainly because I like it You can get unique furniture much cheaper. So I buy wood from the hardware store, cut a piece from my foam supply (mattress I no longer need) and choose a color from the existing faux leather (always buy a little more).
I would the cutouts not according to a template but first with the hole saw and then with the jigsaw. The wooden connections are of course doweled. In the end I will probably be quicker and also significantly cheaper. It’s just that I most likely don’t correspond to the customer group you’re looking for.
In my eyes, a typical Twercs customer looks like this (I could be wrong): He’s more of a hobbyist than a do-it-yourselfer, but he also wants to be able to say “I built this.” The cost is irrelevant because that’s not what’s important to him . He or she is not yet sufficiently skilled in craftsmanship to plan a stool and push the wood over the table saw.

Stool from the Twerks creative kit
So what does this person do? He grabs a kit or charging case from Vorwerk Twercs that contains the prepared parts and can build it with a handful of tools. It is Not unique, but self-made. It is precisely this customer who will find the right tool with Twercs and the right projects with the creative kit. Maybe he’ll build his way through all the creative kits and charging cases from Vorwerk Twercs, or maybe he’ll become a do-it-yourselfer who will soon buy his tools individually because he has different and specific requirements. There’s no telling, but he’ll be happy with Twercs and the creative kit for as long as he can.
Actually, I am too inclined to complain about the price, but we just had the topic of cordless tools and tool families. Some people also complained that cordless tools are not always necessary and are more expensive than others. Unfortunately I have to agree. Nevertheless, I countered by saying that I like the tools so much and am willing to pay more for them. The concept has to fit the customer.
And just as the slightly more expensive cordless tools from the Power4All family suit me, the creative kits certainly also suit customers who pay more for them. You probably shouldn’t always judge everything based on price.
With this I would like to end my remarks on Thursday. I would definitely have done some things differently with the creative kit, but with the pre-made parts and instructions it’s definitely buildable. There’s really nothing to complain about. The quality of the wood could possibly be a little better.
PS: You can also build soapboxes with a special kit from Vorwerk Twercs.
Image credits: Riccardo Düring/cf (sorted chronologically or according to the order of the images used in the buying guide)