Pictures & picture frames
- Make pictures
- Make your own picture frames
- Painting and stippling
A stretcher frame is used, for example Picture frames for painted pictures and photo prints. The classic stretcher frame is a wooden structure onto which a canvas is stretched. As a rule, the frame is made of soft wood, the canvas itself can be made of various textiles. The mitred corners are connected to each other using a plug-in device. Everything is only properly fixed by the stretched sheet.
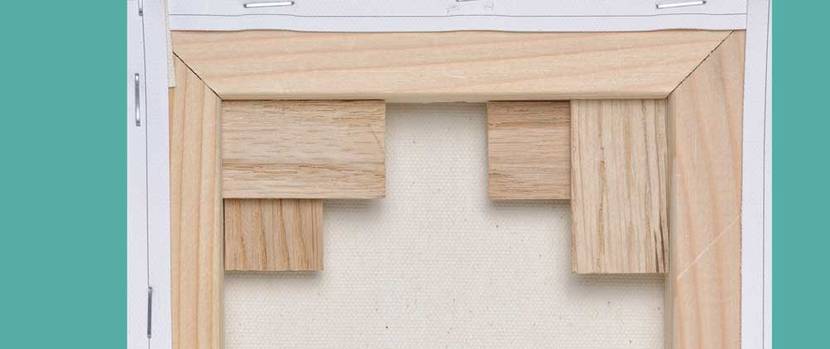
If the tension of the canvas decreases over time, this can be remedied by so-called “wedging” the frame elements: This involves placing wooden wedges in the miter of the frame, causing them to expand and increase the tension.
Here you will learn how to build a stretcher frame of any size step by step and cover it with a canvas.
Art print on stretcher frame
But not only hand-made works of art are traditionally found on canvases: Art prints are also available on canvas. In this form they appear more elegant and of higher quality than simple posters. A sophisticated variation of this art is the distribution of a print across several canvases – a special, modern look is created that is difficult to achieve with classic works of art. Here you can buy art prints on stretcher frames online.
- View stretcher frames on Amazon.de »
Instructions: Build your own stretcher frame
Material requirements
- 4 wooden strips for the stretcher frame
- 4 flat dowels
- wood glue
- hammer
- Frame tensioner
- miter saw
- Flat dowel milling machine
Anyone who has experience in woodworking can build a stretcher frame of any size themselves. However, building it yourself is only worthwhile if you already have the necessary tools. Alternatively, there are ready-cut stretcher frame strips available in stores from which you can build the frame. For a homemade stretcher frame you need the following tools and materials:
The first step is to cut the stretcher frame strips to the correct dimensions saw it to a 45° miter. A groove for the flat dowel is then milled into each mitered edge. Alternatively, the strips can also be attached to each other using a. Now put wood glue into the groove and press the flat dowel in. Then you push the stretcher frame strips into each other. At the corner of a table edge you check whether the corners of the stretcher frame are square. Then you tap them into place with a hammer. For a stable connection, clamp the frame in a frame clamp with corner connectors until the wood glue has dried. For larger frames, an additional cross brace is attached in the middle.
Cover the stretcher frame with canvas
Material requirements
- Stretcher frame
- canvas
- 4 wooden wedges
- Hand stapler or electric stapler
- Cutter knife
After the glue has dried, you can cover the stretcher frame with a canvas. For this you need:
The canvas or painted picture is placed on the table with the painted side down and the stretcher frame is positioned on it. As a test, place the protruding edge of the canvas outwards over the edge and – if necessary – correct the position of the frame.
First, staple the long sides of the canvas to the frame and work your way from the middle to the end of the strip, without fastening the corners.

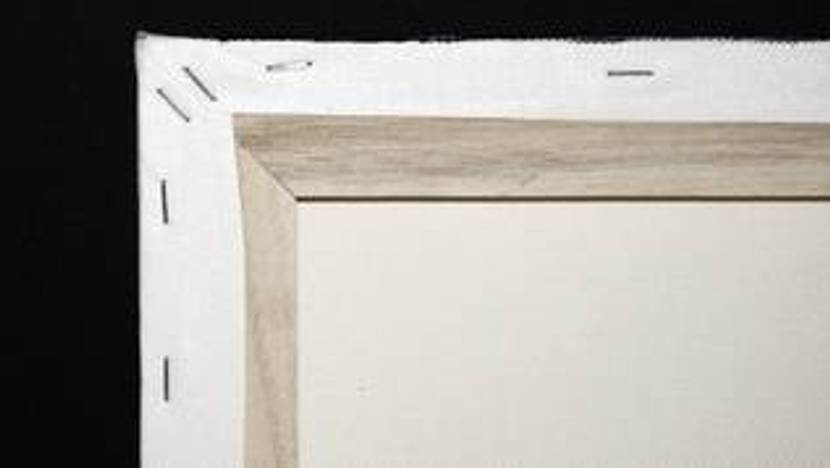
The headboard and baseboard are then covered in the same way. It is important that the canvas is stretched and does not curl at the edge. Finally, fold the protruding canvas in the corners and staple it to the stretcher frame. After covering, the canvas must no longer bulge.
To prevent bulges from forming on the canvas later, four wooden wedges are placed in the corners of the stretcher frame and fixed with wood glue.
Tip: Slightly moistening the canvas fabric with a spray bottle will make it easier to stretch. However, it must not be too wet, otherwise the cloth will be more stretchy and can tear more quickly after drying. For larger canvases, stretch the fabric diagonally, starting, for example, in the top left corner and the bottom right corner.
Before painting, the canvas should be primed with a glue solution. This means it absorbs the color better and the colors become stronger.


Design ideas for the canvas
You can then start designing the canvas. There are no limits to your imagination. If you don’t dare, come along Oil paints or acrylic When painting landscapes or similar, you can achieve impressive effects using simple means.
Why not try it out, for example? Stencils and spray paints in different colors. To do this, make stencils and negative stencils out of sturdy cardboard, for example petals in different sizes. First, draw some green styles where the flowers and leaves will be. Then drape the stencils over the image and carefully spray the exposed areas with different colors. Repeat this process several times so that the leaves partially overlap and the different shades come into their own. You will be amazed at how easy it is and how effectively your sea of flowers will twine across the canvas.
- View frame tensioners on Amazon.de »
Image credits: Adobe Stock/fpic, ‘Build your own stretcher frame’: by Alice Wiegand(Wikimedia Commons), ‘Stretcher frame with a stretched canvas’: by Alice Wiegand(Wikimedia Commons), ‘Wooden wedges for re-tensioning the canvas’: by Gmhofmann(Wikimedia Commons) , ‘Attach wooden wedges to the stretcher frame’: by Gmhofmann (Wikimedia Commons), ‘Build your own stretcher frame’: by Alice Wiegand (Wikimedia Commons), ‘Stretched canvas frame’: by Alice Wiegand (Wikimedia Commons), ‘Wooden wedges for re-tensioning the canvas ‘: by Gmhofmann(Wikimedia Commons), ‘Attach wooden wedges to the stretcher frame’: by Gmhofmann(Wikimedia Commons) (sorted chronologically or according to the order of the images used in the buying guide)